
“Tack” is everything a horse wears to be ridden: the saddle, the bridle, the bit and the bits and pieces in between. It can look baffling at first — dozens of straps and buckles, and bits that all look alike. Here’s the beginner’s tour: what each piece is for, a short history of how it all came about, and how to look after it.
The saddle
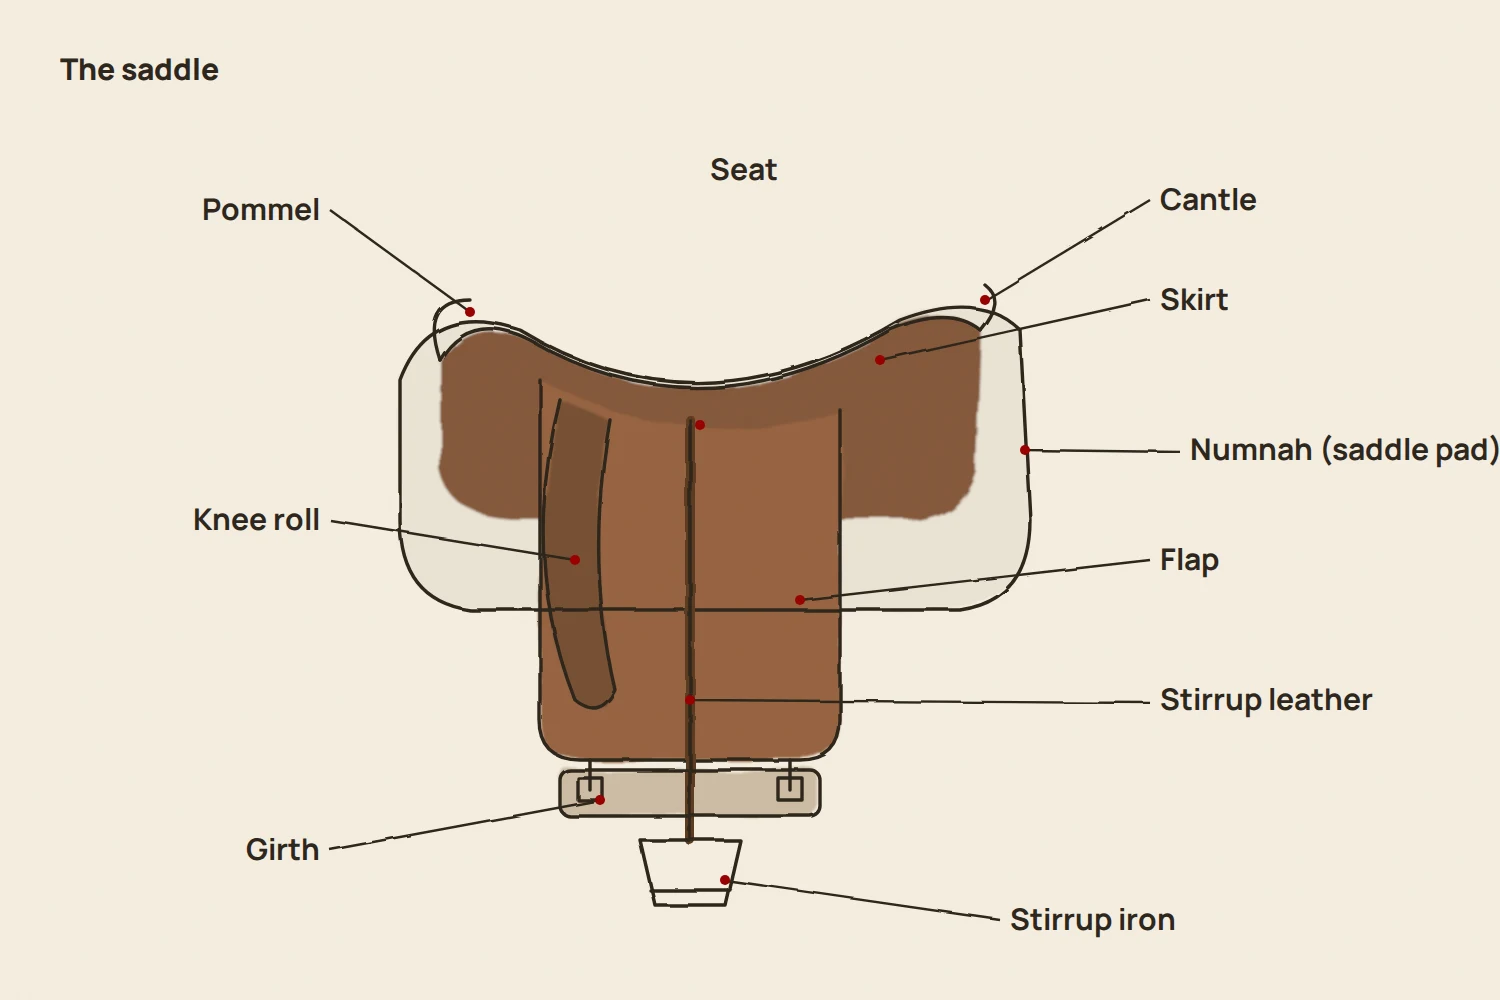
The saddle spreads the rider’s weight over the horse’s back and gives the rider a secure, balanced seat. The drawing at the top of this guide names the main parts:
- Pommel and cantle: the raised front and back of the saddle.
- Seat: the dip in between, where you sit.
- Flap and knee roll: the large leather panel under your leg, with padding at the front to support your knee.
- Stirrup leathers and irons: the adjustable straps and the metal stirrups your feet rest in.
- Girth: the strap under the horse’s belly that holds the saddle in place.
- Numnah: the soft saddle pad underneath, which cushions the back and soaks up sweat.
Fit matters more than anything. A saddle that pinches or rocks can make a horse sore and unhappy. Horses change shape with age, fitness and the seasons, so have the fit checked regularly by a qualified saddle fitter — the Society of Master Saddlers keeps a register.
The bridle
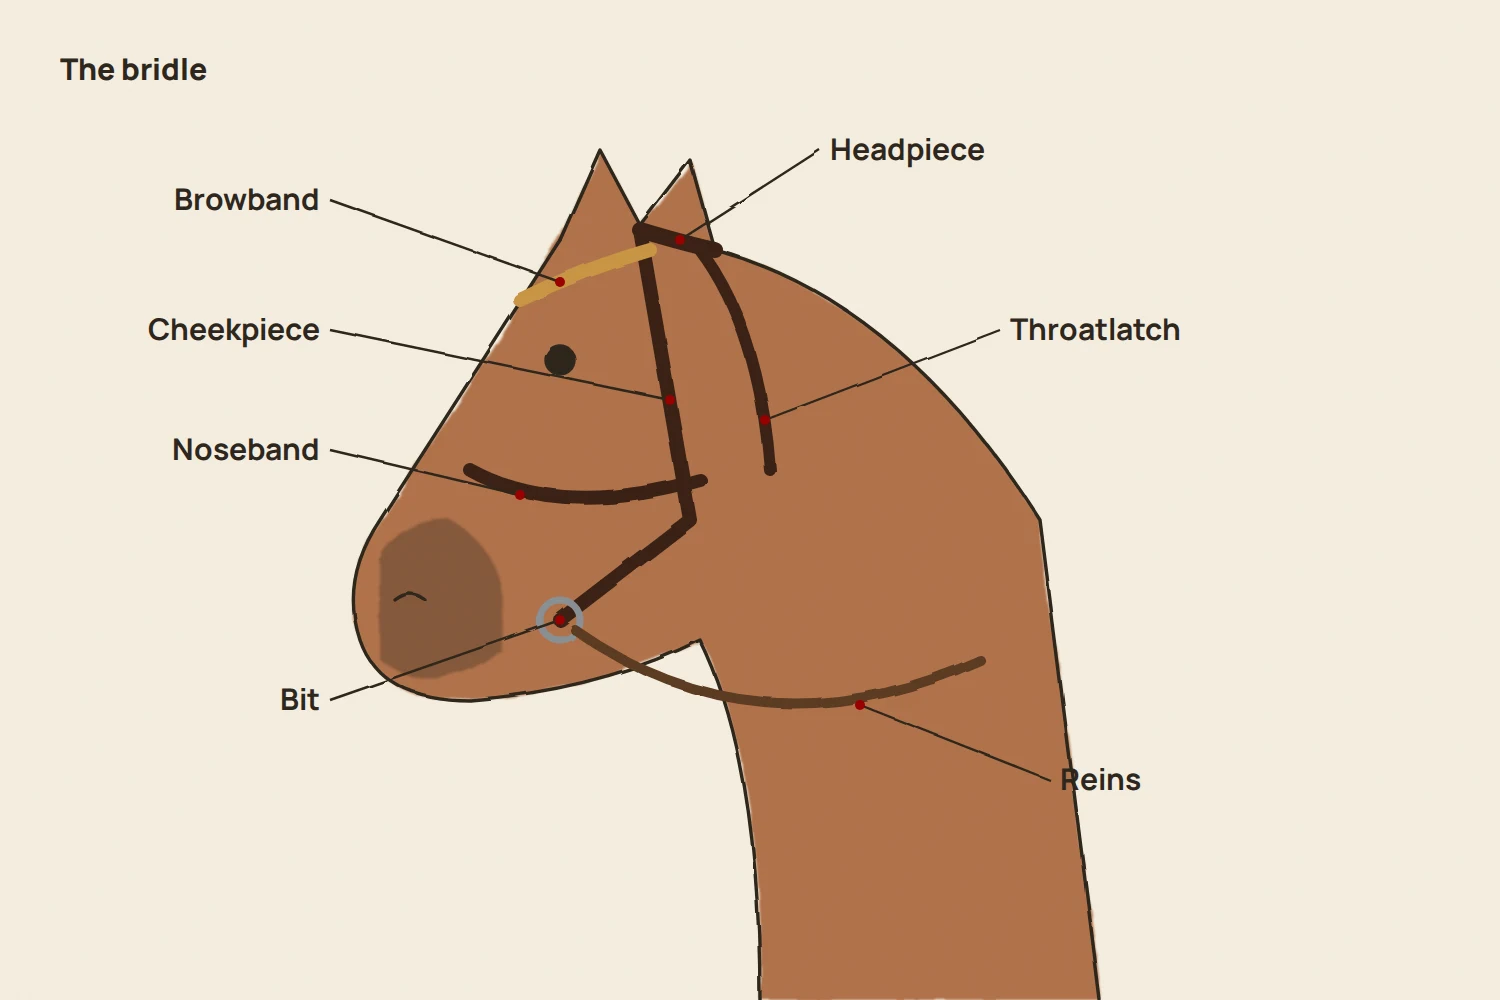
- Headpiece: sits behind the ears and holds everything up.
- Browband: across the forehead, stopping the headpiece slipping back.
- Cheekpieces: run down each side of the face and hold the bit.
- Noseband: around the nose; there are several styles for different jobs.
- Throatlatch: under the throat, stopping the bridle coming off over the ears.
- Bit and reins: the bit sits in the horse’s mouth; the reins connect it to your hands.
As a rough guide, you should fit a fist between the throatlatch and the cheek, two fingers under a plain noseband, and the bit should sit so it makes a wrinkle or two at the corners of the mouth. Ask an experienced person to check until you’re confident.
Bits: why there are so many
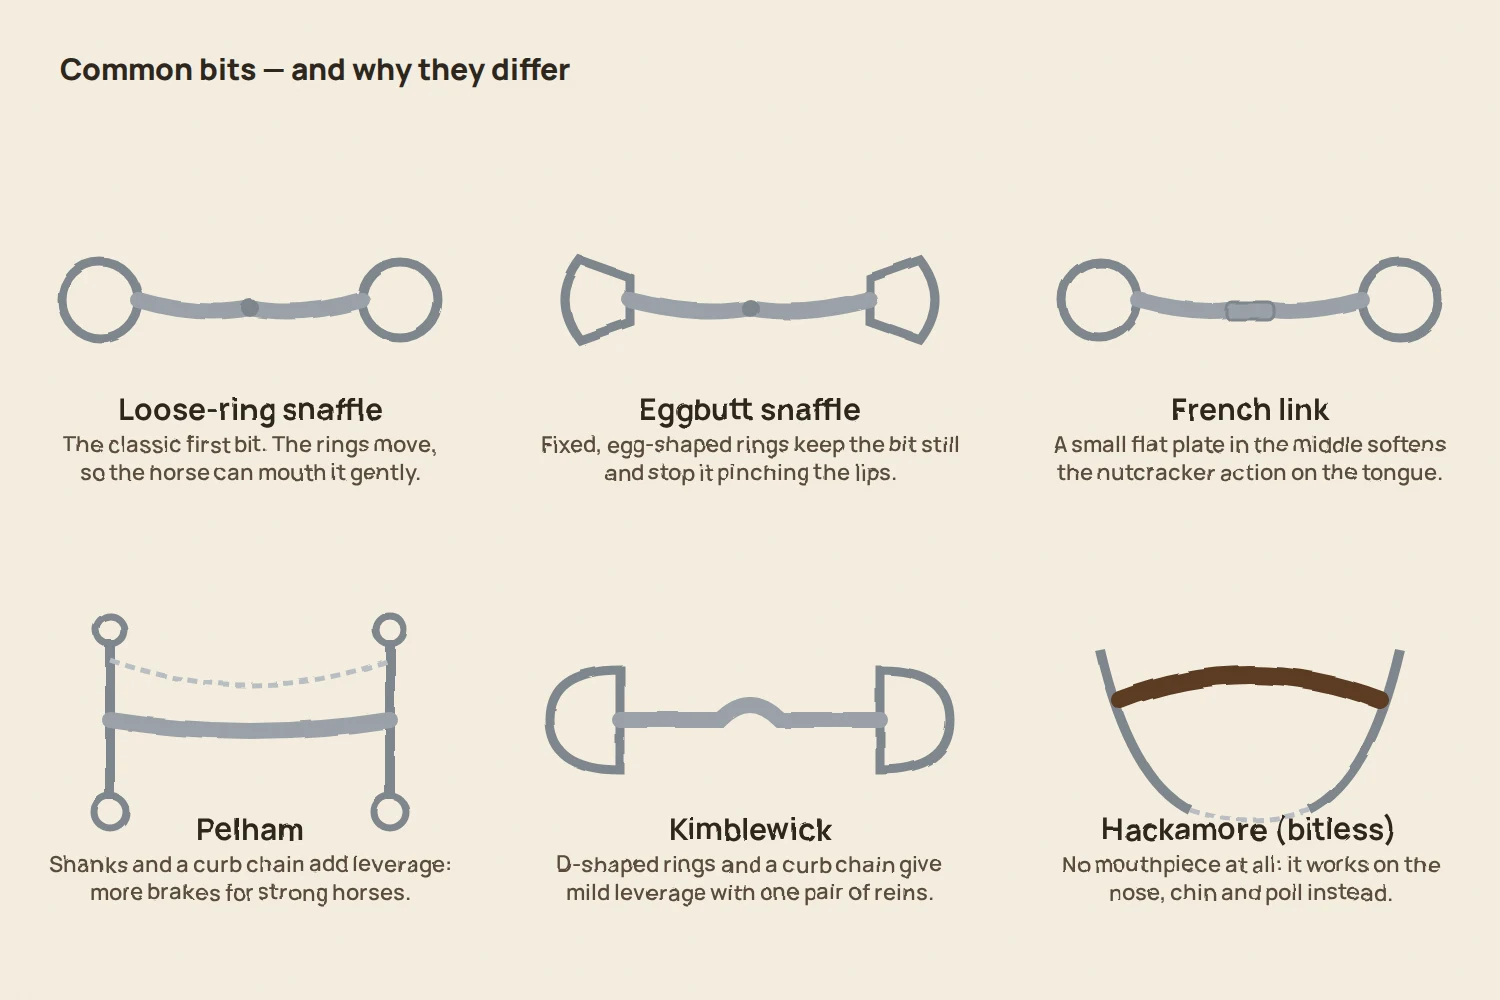
A bit is a way of talking to your horse, not a set of brakes. Bits differ in three main ways:
- The mouthpiece: a single joint, a double joint (like the French link) or a straight bar all sit differently on the tongue and bars of the mouth.
- The rings: loose rings move and encourage a horse to mouth the bit softly; fixed rings, such as the eggbutt, keep it still.
- Leverage: bits with shanks and a curb chain, like the Pelham and Kimblewick, add pressure under the chin and on the poll, giving more control for strong horses. Bitless bridles, such as the hackamore, work on the nose, chin and poll with no mouthpiece at all.
Most horses go happily in a simple snaffle. Choosing anything stronger is a decision for an experienced coach — and kind, quiet hands matter far more than any bit. If you compete, check your discipline’s rule book, as only certain bits are allowed.
From the steppe to the saddler: a short history
- The first bits: wear on ancient horse teeth from the Botai culture of Kazakhstan, around 3500–3000 BC, was long taken as the first evidence of bridled horses — though scientists still debate it. The earliest clear bit wear actually comes from a donkey, around 2700 BC.
- Roman saddles: by the 1st century BC the Romans rode on a solid, four-horned saddle that held the rider securely — but still without stirrups.
- The stirrup: paired stirrups first appear in China around AD 322, were common there within a century, and reached Europe with the peoples of the steppe by around the 7th or 8th century — changing riding, and warfare, for ever.
- The modern saddle: in the early 1900s the Italian cavalry officer Federico Caprilli championed the forward seat over fences, and jumping saddles have been shaped around it ever since. Today’s saddles add adjustable trees and modern materials — but a good saddler’s craft is still at the heart of it.
Safe tack is checked tack
Before every ride, check stitching, buckles and keepers, especially on the stirrup leathers, girth straps and reins — a snapped strap can cause a serious fall. Tighten the girth gradually, and never tie a horse up by its reins.
Cleaning: after every ride
- Rinse the bit in clean water straight away, before saliva and food dry on.
- Wipe off sweat and mud from the saddle, girth and bridle with a damp sponge — sweat dries leather out and rots stitching.
- Saddle soap the leather lightly with a barely damp sponge, especially where it touches the horse.
- Look as you clean: it’s the best moment to spot cracks, wear or loose stitching.
The deep clean
- Take the bridle apart, noting how it goes back together, and clean every strap, buckle and keeper.
- Remove the stirrups and leathers and clean underneath the flaps.
- Condition the leather sparingly so it stays supple — too much oil makes it soft and stretchy.
- Wash numnahs and fabric girths, and clean stirrup irons and the bit thoroughly.
- Follow the maker’s advice for synthetic tack.
Storing tack
Keep tack in a dry, airy tack room, with saddles on a proper rack under a cover and bridles hung on a rounded hook. Never dry wet leather next to a heater — let it dry slowly. Good tack, looked after, lasts for many years.
New to all this? Nikki is always happy to show riders how to tack up and fit their own horse’s kit during a coaching session.
Nikki Ward · Pentonville Lodge
For the latest from the yard, follow us on Instagram · Facebook · YouTube · X.